Clarity + Angular 5 with ASP.NET Core
In this article, I’m going to demonstrate how to update an Angular ASP.NET project created in Visual Studio 2017 to use Angular 5 and Clarity Design System.
1. Create an Angular ASP.NET project in Visual Studio 2017
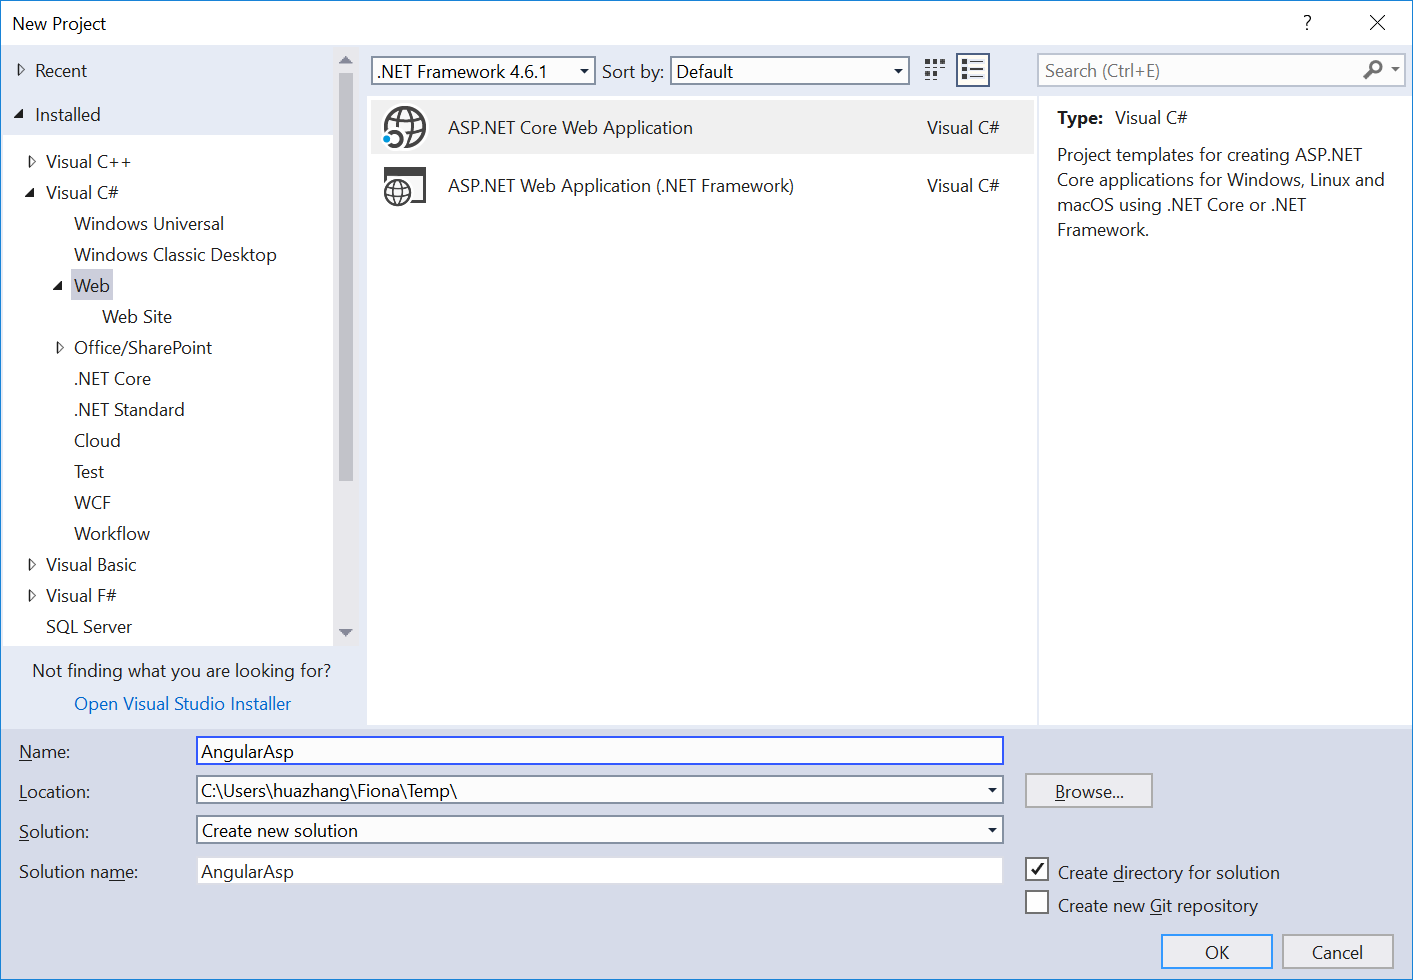
Open Visual Studio 2017, New Project -> Web -> ASP.NET Core Web Application.

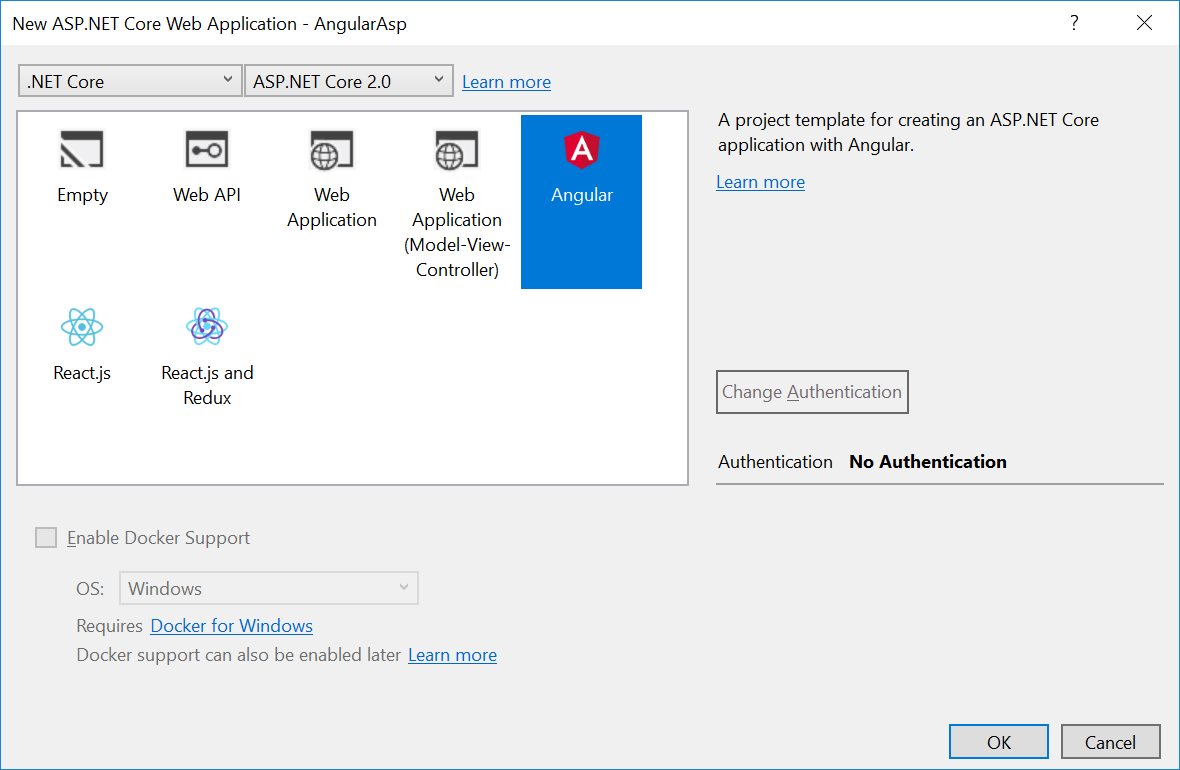
Choose Angular as the Web framework

2. Upgrade Angular 4 to Angular 5
Open file package.json in the newly created project, you will find it’s Angular 4.
"@angular/animations": "4.2.5",
"@angular/common": "4.2.5",
"@angular/compiler": "4.2.5",
"@angular/compiler-cli": "4.2.5",
"@angular/core": "4.2.5",
"@angular/forms": "4.2.5",
"@angular/http": "4.2.5",
"@angular/platform-browser": "4.2.5",
"@angular/platform-browser-dynamic": "4.2.5",
"@angular/platform-server": "4.2.5",
"@angular/router": "4.2.5",
However, Clarity depends on Angular 5. Hence, we have to upgrade it to Angular 5. To install @angular packages of version 5.0.x, run command:
npm install --save-dev @angular/common@5.0.x @angular/compiler@5.0.x @angular/compiler-cli@5.0.x
@angular/core@5.0.x @angular/forms@5.0.x @angular/http@5.0.x @angular/platform-browser@5.0.x
@angular/platform-browser-dynamic@5.0.x @angular/platform-server@5.0.x
@angular/router@5.0.x @angular/animations@5.0.x
In addition to upgrade @angular packages, we should also install the latest webpack tools.
npm install --save-dev @ngtools/webpack@latest
Finally, we have to update typescript and rxjs packages.
npm install --save-dev typescript@2.4.2 rxjs@5.5.5
3. Install Clarity
npm install --save-dev @clr/angular@latest @clr/icons@latest @clr/ui@latest
4. Import Vendor JavaScript Files
Open file boot.browser.ts, import dependent JavaScript files at the top:
import 'core-js/client/shim.min.js';
import 'mutationobserver-shim/dist/mutationobserver.min.js';
import '@webcomponents/custom-elements/custom-elements.min.js';
import '@clr/icons/clr-icons.min.js';
import 'web-animations-js/web-animations.min.js';
5. Use Clarity Styles
Open file webpack.config.vendor.js. Please note that this file is not managed by the Viusal Studio solution. You can find it at the project folder. Add Clarity css files to the nonTreeShakableModules array.
const nonTreeShakableModules = [
    ...,
    '@clr/icons/clr-icons.min.css',
    '@clr/ui/clr-ui.min.css'
];
6. Use Clarity Module
Now, by importing ClarityModule into the @NgModule, you are ready to use it. You only need to import the module in the file app.shared.module.ts.
@NgModule({
	imports: [
		...,
		ClarityModule,
		...
	]
})
By going through the steps above, Clarity + Angular 5 environment is ready. However, I want to add two more steps, one is how to stage the assets in the web container. The other is how to use SASS.
7. Copy Assets
Firstly, create a new folder named assets under ClientApp, where you are going to put all of your images and fonts. Then install copy-webpack-plugin package.
npm install --save-dev copy-webpack-plugin@latest
Finally, use the package to copy assets from the source folder to the destination folder. Open file webpack.config.js
const CopyWebpackPlugin = require('copy-webpack-plugin');

...
modlue.exports = (env) => {
	const sharedConfig = {
		...
		plugins: [
            ...,
            new CopyWebpackPlugin([{ from: './ClientApp/assets', to: 'assets/' }])
        ]
    };
}
Thus, all of the resources in assets will be copied to dist/assets folder.
8. SASS
To use SASS to write css, firstly, you have to install sass-loader and node-sass packages.
npm install --save-dev sass-loader@latest node-sass@latest
Then, modify the file webpack.config.js to use the sass-loader.
modlue.exports = (env) => {
	const sharedConfig = {
		...
		module: {
            rules: [
            	...,
            	{ test: /\.scss$/, loaders: ['to-string-loader', 'css-loader', 'sass-loader'] },
            	...,
        	]
    	}
    };
}
Done!