Table, Overlay and Event
Think big, Act small! Yep, It’s typical me. I was conceiving of some fancy app like Google Doc, whereas I ended up with a tiny piece like the following.
How to play with it? Well, clicking on one table cell starts drawing the overlay. Moving the cursor around moves and expands the overlay. Clicking once again ends the drawing process. The final overlay is a large rectangle which covers an area formed by the starting cell and the ending cell. Actually, the starting table cell and the ending table cells form two corners of the overlay. What I have learned from making this little app?
- How to layout overlay?
Apparently, it should be positioned absolutely. And the stack order of it must be large enough so that it’s displayed in the front.
.overlay {
    background-color: rgba(82, 146, 247, .1);
    position: absolute;
    z-index: 10
}
- How to detect the table cell under mouse?
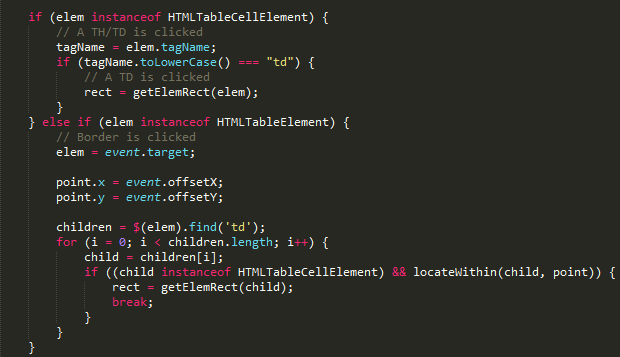
If the center of a table cell is clicked, the target or srcElement of the event is exactly the cell element under mouse. However, if the border is clicked, the cell under mouse have to be calculated out via the mouse position.

- How to forward mouse event through layers?
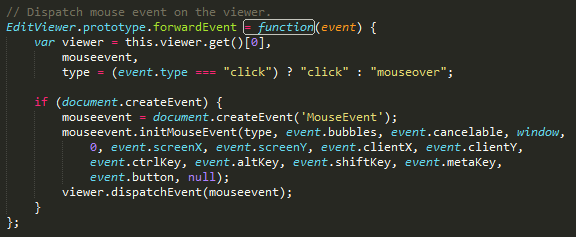
The key-point of forwarding the mouse event from the overlay to the underline table is to re-dispatch the mouse event on the table. At re-dispatching, the location of the mouse cursor must be preserved, so that this location could be used later on to calculate the table cell under mouse.
